Updating WordPress is necessary and occasionally terrifying. Necessary because outdated software is the number one way sites get hacked. Terrifying because everyone has heard the story, or lived it, where an update turned a working site into a white screen or a broken layout right before a big day.
Here is the thing: updates rarely break sites at random. They break sites that were updated carelessly, all at once, on the live site, with no backup and no way to undo. Do it with a little process and the risk drops to almost nothing. The process is not complicated, and once you have it, updating stops being the button you avoid.
This guide walks the safe way to update WordPress step by step: what to do before you touch anything, how to use a staging site, the right order to update in, how to test, and exactly what to do when an update does break something. If you want the separate question of how often to run these updates, our guide on how often to update a WordPress site covers the cadence. This one is about doing it safely.
How do you safely update WordPress?
You update WordPress safely by backing up first, testing the update on a staging copy, and changing one thing at a time on the live site so any problem is isolated and reversible. That is the entire method. Every step below is just a detail of those three ideas: have a way back (backup), try it somewhere safe first (staging), and never lose track of what changed (one at a time).
The reason this works is that it removes the two things that turn a routine update into a disaster: not being able to undo, and not knowing what caused the break. Fix those and updating is boring, which is exactly what you want it to be.
| Step | What it prevents |
|---|---|
| Back up first, off-site | A broken update becoming permanent, with no way back |
| Update on staging first | Your live site being the place you discover the problem |
| Update one thing at a time | Not knowing which change caused the break |
| Test after each change | A silent break, like a dead form, going unnoticed |
| Keep the backup until confirmed | Being stuck if a problem shows up an hour later |
Step 1: Back up your site first, always
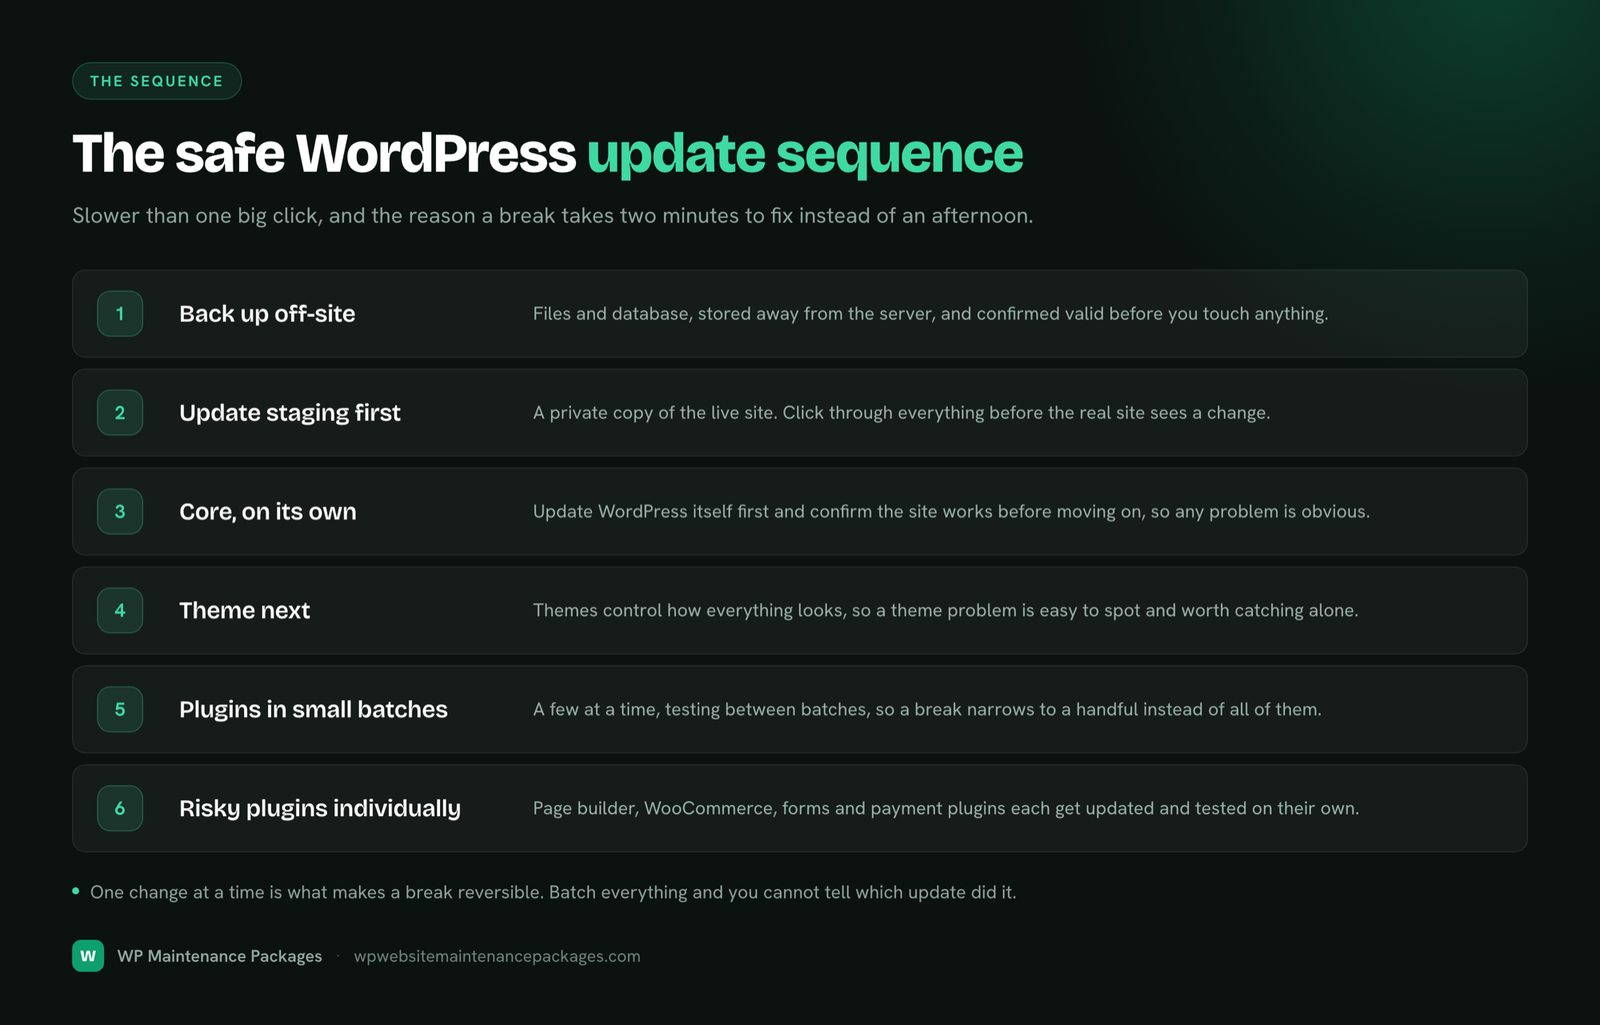
Before any update, take a complete backup of your site, files and database, and store it somewhere separate from your server. This is non-negotiable and it is the single thing that makes every other risk manageable. With a good backup, the worst case of any update is “restore and try again,” which is annoying but not a crisis. Without one, a bad update can mean rebuilding the site.
Off-site matters specifically. A backup sitting on the same server does you no good if the server itself has the problem, and it is not there if you need to move hosts in a hurry. Make sure the backup actually completed and is valid, since an untested backup is just a file you are hoping works. If you do not have reliable automated backups running, that is the first thing to fix, and our website backup services handle exactly this.
Warning: Never run an update on a live site whose last backup is old or unverified. If the update breaks something and the backup fails to restore, you have two problems at once. Confirm a fresh, valid backup exists before you click anything.
Step 2: Test updates on a staging site first
A staging site is a private copy of your live site where you can try changes safely. You update the staging copy, click through everything to confirm nothing broke, and only then apply the same updates to the live site. It is the difference between discovering a problem in private and discovering it in front of your customers.
Many good hosts offer one-click staging, which makes this easy. If yours does, use it, especially for major core updates and anything on a store or a business-critical site. Staging is the closest thing to a guarantee that an update is safe, because you have literally already watched it work on a copy of your exact site. For a simple brochure site with a solid backup you can sometimes skip straight to a careful live update, but for anything that matters, staging first is the professional standard.
Step 3: Update in the right order, one thing at a time
The biggest self-inflicted update disaster is clicking “update all” and then discovering the site is broken with no idea which of the fifteen changes did it. Avoid that by updating in a deliberate order and testing between steps.
- Update the WordPress core first, on its own. Then check the site works before moving on. Core updates are usually safe, but you want them isolated so a problem is obvious.
- Update your theme next. Themes control how the whole site looks, so a theme problem is easy to spot and worth catching alone.
- Update plugins in small batches. Group a few at a time rather than all at once, testing after each batch. If something breaks, you have narrowed the cause to a handful of plugins instead of all of them.
- Do the risky plugins individually. Your page builder, WooCommerce, forms and payment plugins each deserve to be updated and tested on their own, because they are the ones most likely to break something visible.
Yes, this is slower than one big click. It is also how you keep the ability to point at the exact change that caused a problem, which is what makes fixing it a two-minute job instead of an afternoon.
Step 4: Test the site after updating
Applying an update is not the finish line. The finish line is confirming the site still works, and that means actually looking, not assuming. After updating, check the things that matter most and are most likely to break quietly.
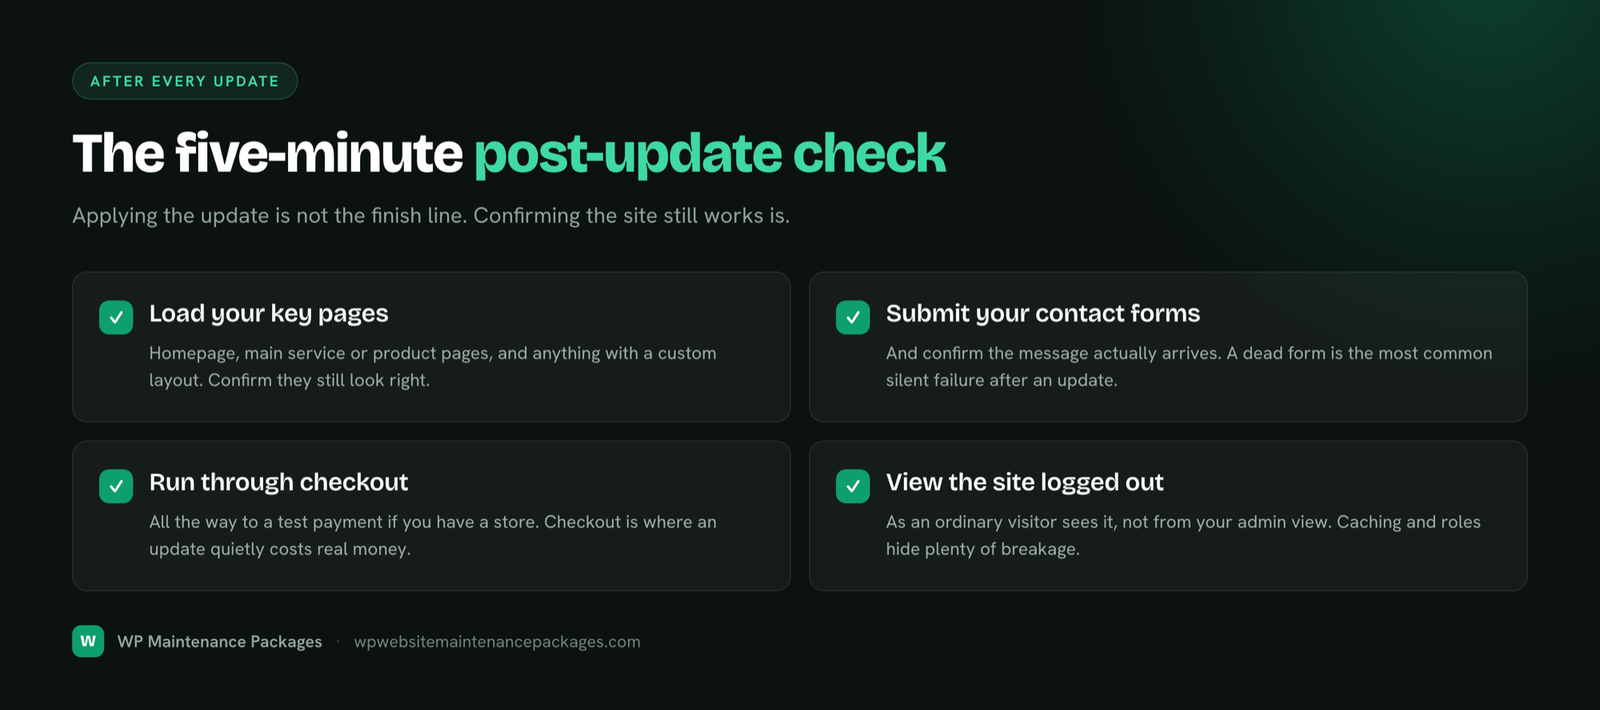
- Load your key pages, homepage, main service or product pages, and anything with a special layout, and confirm they look right.
- Submit your contact and lead forms and confirm the message actually arrives. A broken form is the most common silent failure after an update, and you lose leads without ever seeing an error.
- Run through checkout if you have a store, all the way to a test payment. Checkout is where an update quietly costs you real money.
- Check the site logged out as a normal visitor sees it, not just from your admin view.
This five-minute check is what separates real maintenance from clicking update and hoping. The whole point of updating carefully is undone if you never confirm the result.
Expert tip: Keep a short list of the exact pages and forms to test on your site, so checking after an update is a quick routine rather than a guess. On a store, that list always ends with a test order through checkout.
What to do when an update breaks your site
Sometimes an update breaks something despite your best process. That is exactly why you took a backup, so this is a recoverable annoyance, not a disaster. Here is the order to work through it.
First, if you tested on staging, you already caught it there and never pushed it live, so there is nothing to fix on the live site. If it broke on the live site, restore your backup to get back to a working state immediately, then diagnose in staging rather than in public. If you cannot restore right away, the fastest live fix is usually to identify the culprit: since you updated one thing at a time, you know roughly what changed, so deactivate the most likely plugin or switch to a default theme to confirm the cause. Once you know what broke, you can roll that one thing back, look for a newer fix from its developer, or find a replacement.
The situation you never want is a broken live site, no backup, and no idea what changed, because then you are debugging blind under pressure. Every step in this guide exists to keep you out of that corner. If you are already in it, our WordPress maintenance services include fixing broken updates and restoring sites.
Can you automate safe updating?
Partly, and it is worth knowing where the line is. WordPress auto-installs minor core and security updates by default, and those are safe to leave on because they are built to be low-risk. You can also enable auto-updates for simple, well-behaved plugins. The catch is that automation applies the update but does not test the result, so if an auto-update breaks something, nobody knows until a visitor finds it.
That is why the safe version of automation is not “turn everything on and walk away.” It is auto-update the low-risk layer, keep the risky plugins on a manual, tested schedule, and always have monitoring and off-site backups running underneath so any surprise is caught fast and reversible. Real safety is not the absence of humans; it is a human confirming the site still works after the changes that could break it.
The bottom line
Updating WordPress safely comes down to three habits: back up off-site before you start, test on a staging copy before you touch the live site, and change one thing at a time so any break is isolated and reversible. Add a quick test of your key pages, forms and checkout afterward, and updates go from nerve-wracking to routine.
The reason people fear updates is almost always that they have done them the unsafe way, all at once, live, with no backup, and been burned. Do them the safe way and that fear disappears, because you always have a way back. If you would rather never think about it, our WordPress care plans handle updates on a tested schedule, with staging, backups and monitoring built in and no lock-in contracts.
Frequently asked questions
How do I update WordPress without breaking my site?
Back up your site off-site first, update on a staging copy before the live site, and change one thing at a time, testing your key pages and forms after each step. That process isolates any problem and keeps it reversible. Most update disasters come from doing everything at once on a live site with no backup, which these steps prevent.
Should I back up before every WordPress update?
Yes, every time, and the backup should be complete and stored off-site. It is the single thing that makes a bad update recoverable instead of catastrophic. With a fresh backup, the worst case of any update is restoring and trying again; without one, a broken update can mean rebuilding the site.
What is a staging site and do I need one?
A staging site is a private copy of your live site where you can test updates safely before applying them for real. You need one for any site that matters, especially stores and business-critical sites, because it lets you catch a problem in private rather than in front of customers. Many hosts offer one-click staging that makes this simple.
Should I update all my plugins at once?
No. Update in small batches, testing between them, and update risky plugins like your page builder, WooCommerce and forms individually. Updating everything in one click means that if something breaks, you cannot tell which change caused it. Batching keeps the cause easy to find and the fix quick.
Is it safe to enable automatic WordPress updates?
Automatic updates are safe for minor core and security releases, which WordPress enables by default, and for simple, well-maintained plugins. They are riskier for page builders, themes, WooCommerce and payment plugins, which are best updated manually so a human can test the result. Automation applies updates but does not check that the site still works.
What do I do if a WordPress update breaks my site?
Restore your backup to get back to a working state, then diagnose the problem on a staging copy rather than the live site. Because you updated one thing at a time, you will know roughly what changed, so you can roll that one item back or find a fix. This is exactly the situation a fresh backup makes easy.
Why did my site break after updating?
Usually a conflict, where an updated plugin, theme or core version no longer plays nicely with something else on the site. It is rarely random, which is why updating one thing at a time helps you pinpoint the clash. Testing on staging first catches most of these before they ever reach your live site.
How long should updating a WordPress site take?
Done carefully with testing, routine updates take fifteen to thirty minutes for a typical site, longer when a major core version or a tricky plugin is involved. The careful approach is slower than one big click, but far faster than fixing a broken live site. On a schedule, it becomes a quick, predictable weekly task.